Your First Virtual Employee
Hiring your first AI team member is a milestone. On Agntic, the whole process takes under 10 minutes: from your first conversation with Tenma to your worker’s first live call.Time required: Under 10 minutes
What you need: An active Agntic account. Sign up at agntic.ai if you haven’t yet.
What you need: An active Agntic account. Sign up at agntic.ai if you haven’t yet.
The Recruitment Lifecycle
Every Digital Worker follows the same five-stage journey.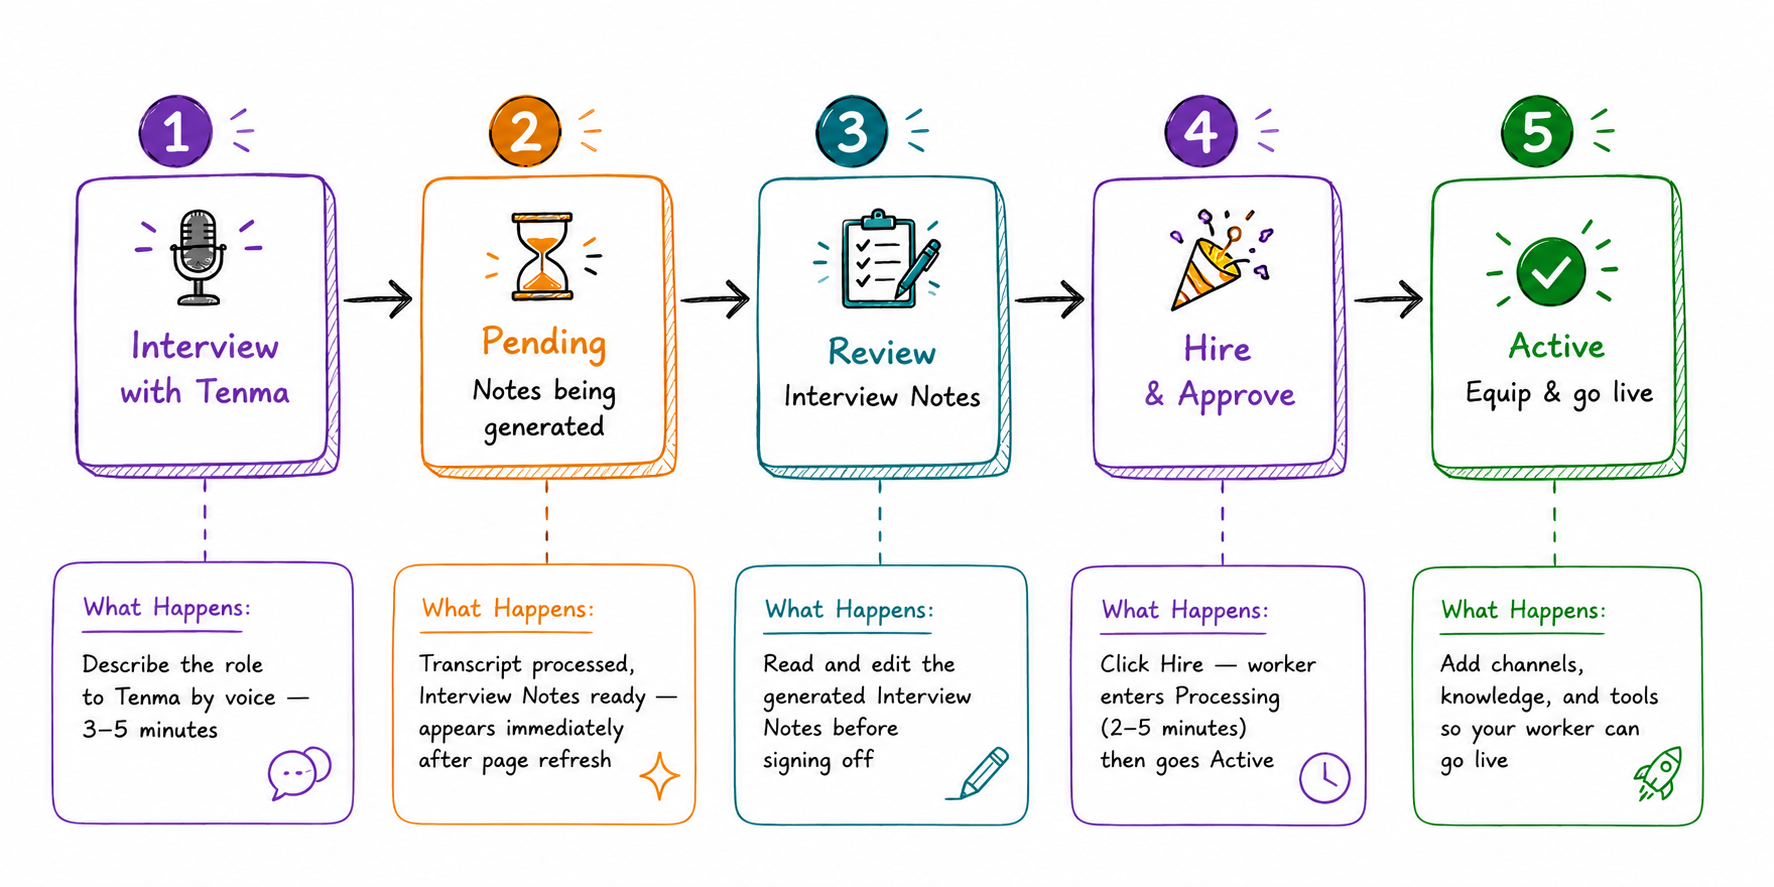
Step-by-Step Guide
Open the Recruitment Console
Log in to agntic.ai. You’ll land on your personal workforce dashboard.In the centre you’ll see the Hire a new team member panel. Click the phone icon to start a live conversation with Tenma, your AI Recruiter.Your existing Digital Workers appear in the Your Team panel on the right.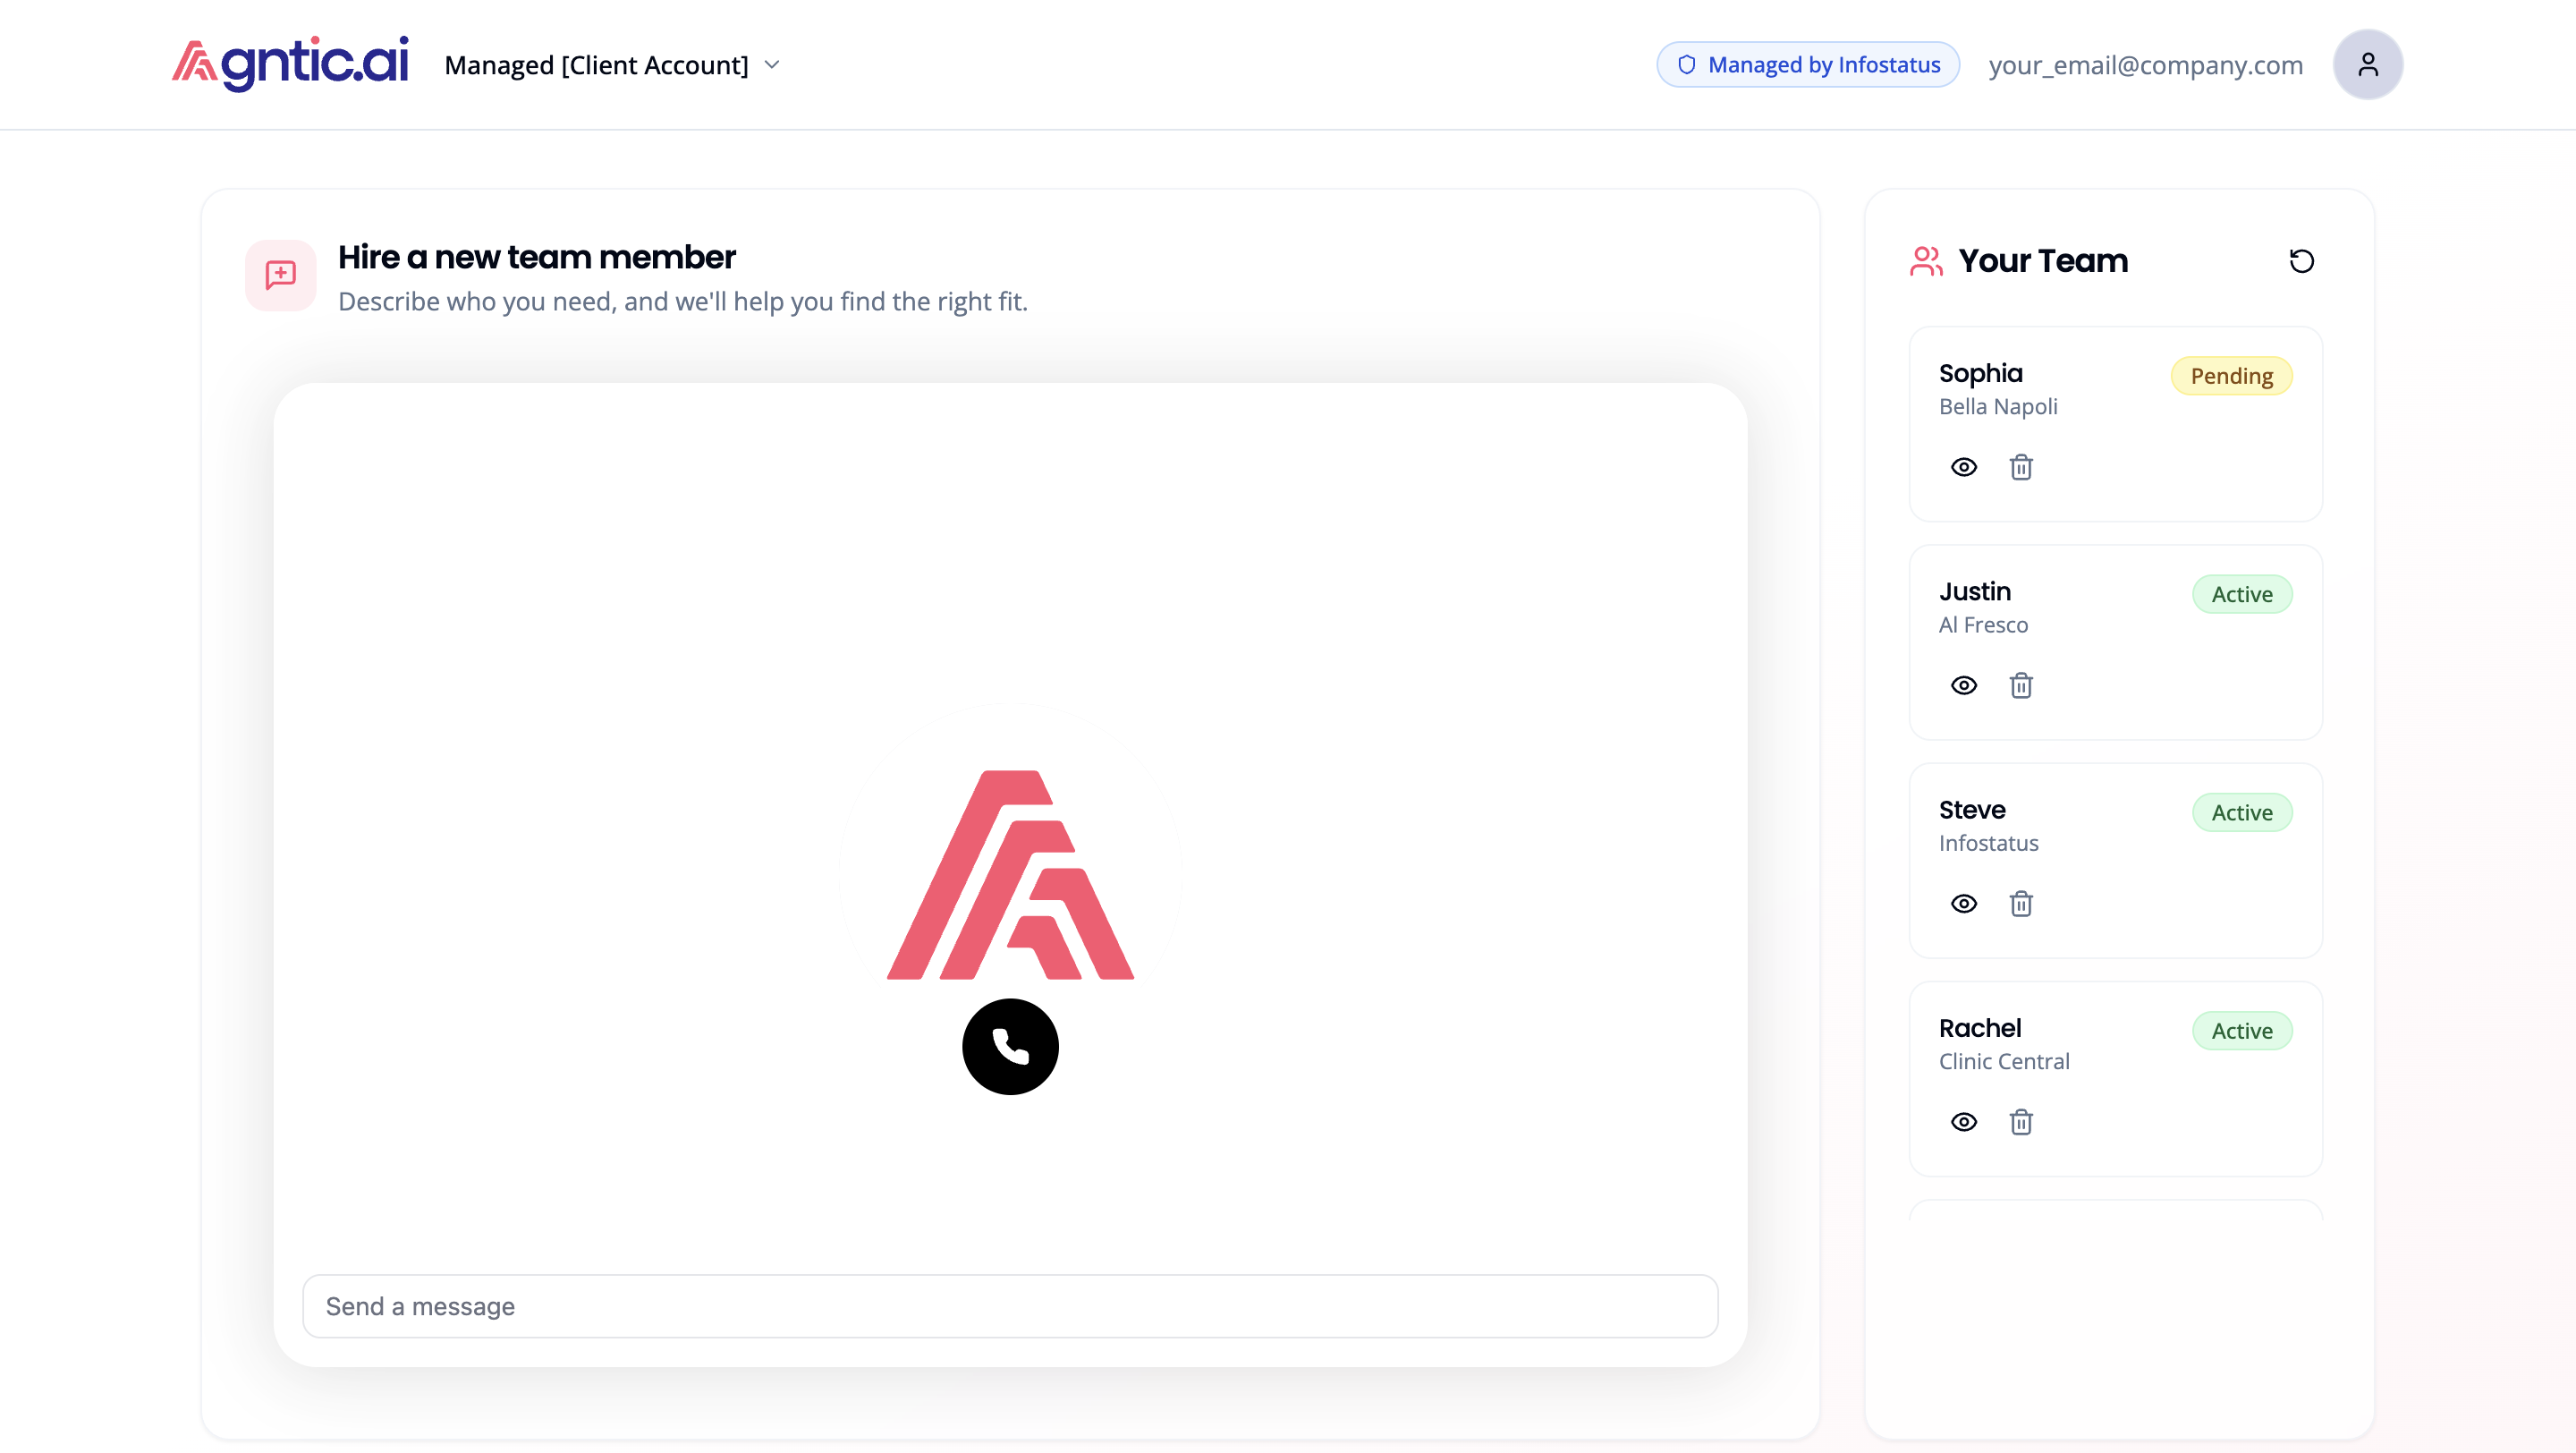
Complete the Interview with Tenma
Tenma leads you through a structured voice interview, typically 3–5 minutes. Be ready to describe:
- Your business: what you do, your industry, and who your customers are
- The role: what types of calls or enquiries your Digital Worker will handle
- Personality: the tone you want (e.g. warm and friendly, crisp and professional)
- Key knowledge: business hours, FAQs, pricing, products, and policies
- Boundaries: what the worker should never say, promise, or discuss
Tenma’s recruitment interview. Respond by voice or text. Tenma continues until it has everything it needs to draft the Interview Notes.
When Tenma is satisfied, it ends the conversation with a confirmation like:“Great! We’ll put together the scope of work and have it ready for your review. You’ll be able to tweak everything before you approve.”
Refresh the Dashboard (Pending)
After the interview ends, Agntic processes the transcript and generates your worker’s Interview Notes in the background.Refresh the page. Your new worker will appear in the Your Team sidebar with a yellow Pending badge, with their Interview Notes ready to review.
Review Interview Notes
Click on your Pending worker in the Your Team sidebar. This opens the Review Interview Notes screen.A three-step progress bar at the top shows where you are: Interview ✓ → Review Notes → Hire.Review everything Tenma captured from your conversation:
Click the Edit button next to any section to correct it. You can revise as many sections as you need before signing off.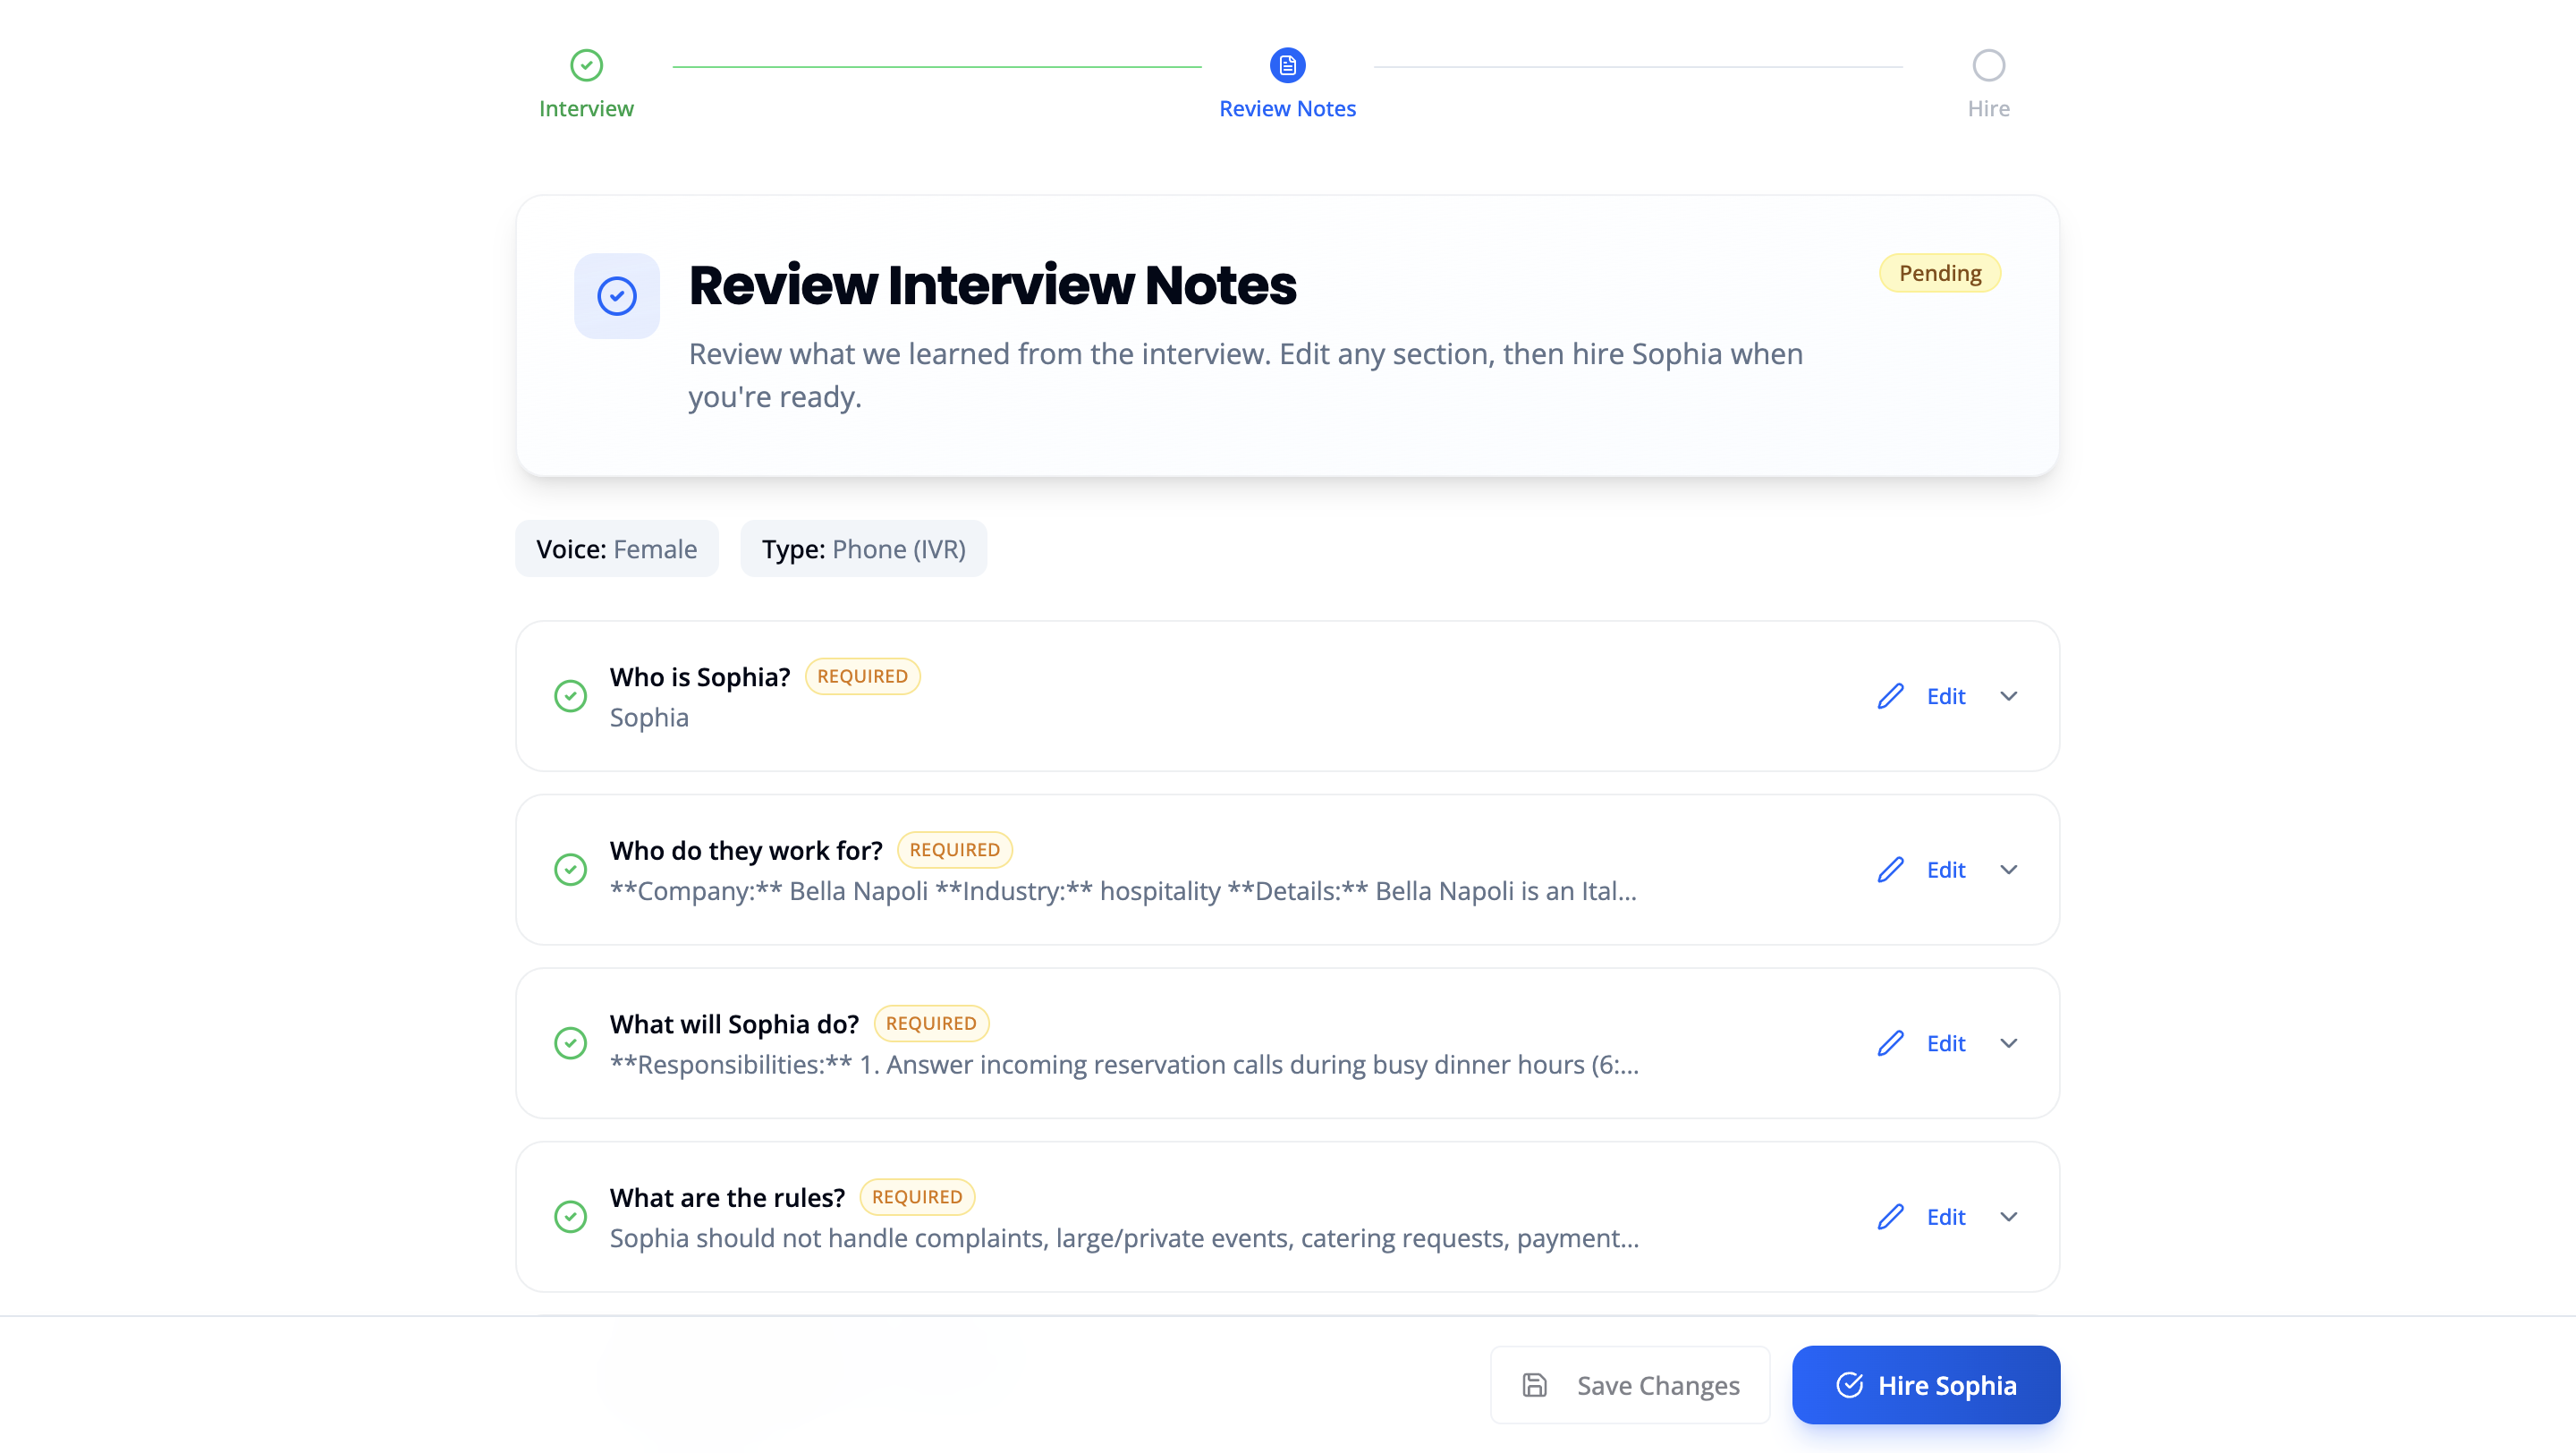 When everything looks right, click Hire [Name] in the bottom-right corner. Your worker enters Processing, which typically takes 2–5 minutes before they go Active.
| Section | What It Covers |
|---|---|
| Who is [Name]? | Worker’s name, identity, and voice |
| Who do they work for? | Your company, industry, and business context |
| What will [Name] do? | Responsibilities and scope |
| What are the rules? | Boundaries and escalation behaviour |
| What do they know? | Pre-loaded knowledge (recommended; can add after hiring) |
Your Worker is Approved
The moment you click Hire, your worker is approved. A confirmation modal appears:“Welcome aboard, [Name]!”From here you can:
- Click Equip [Name] to go straight to their profile and set up channels
- Click Back to Dashboard to return and equip them later
The Welcome modal. Your worker is approved and Active. Click Equip to set up their channels, knowledge, and tools.
Equip Your Worker
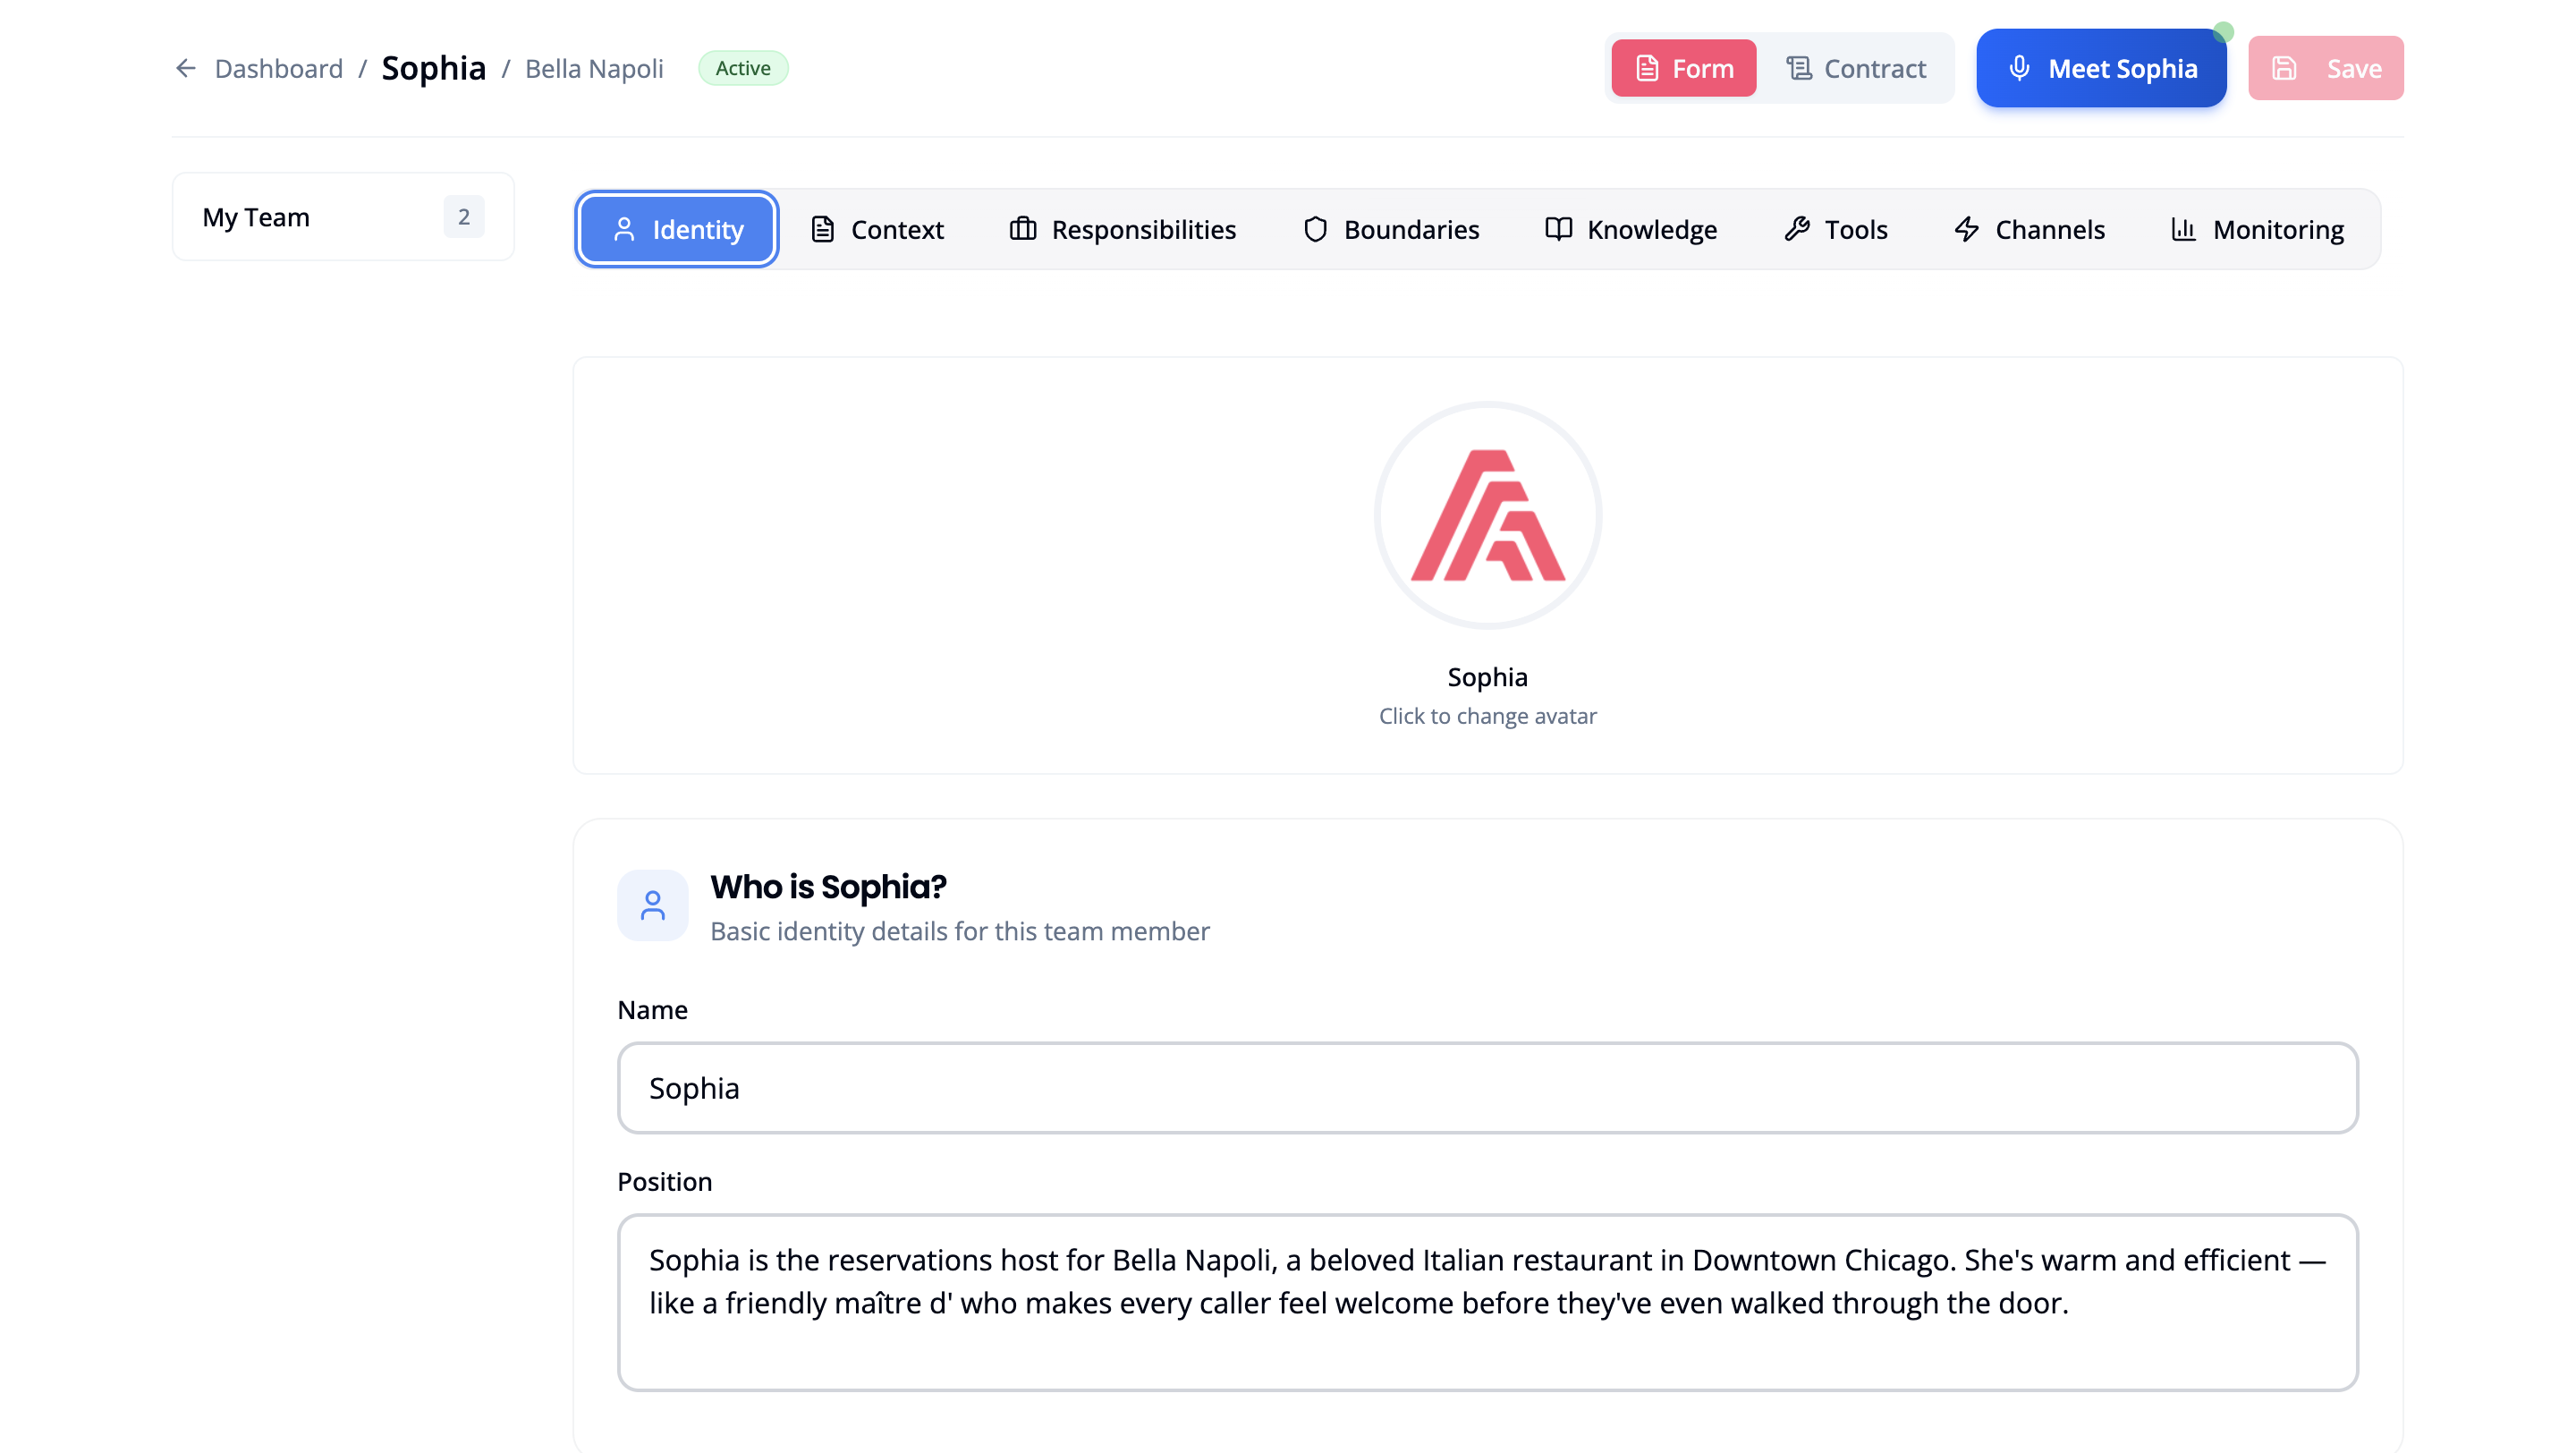
Your worker’s profile opens in Contract view, a clean read of their full Employment Contract. Use the toggle in the top-right to switch between views: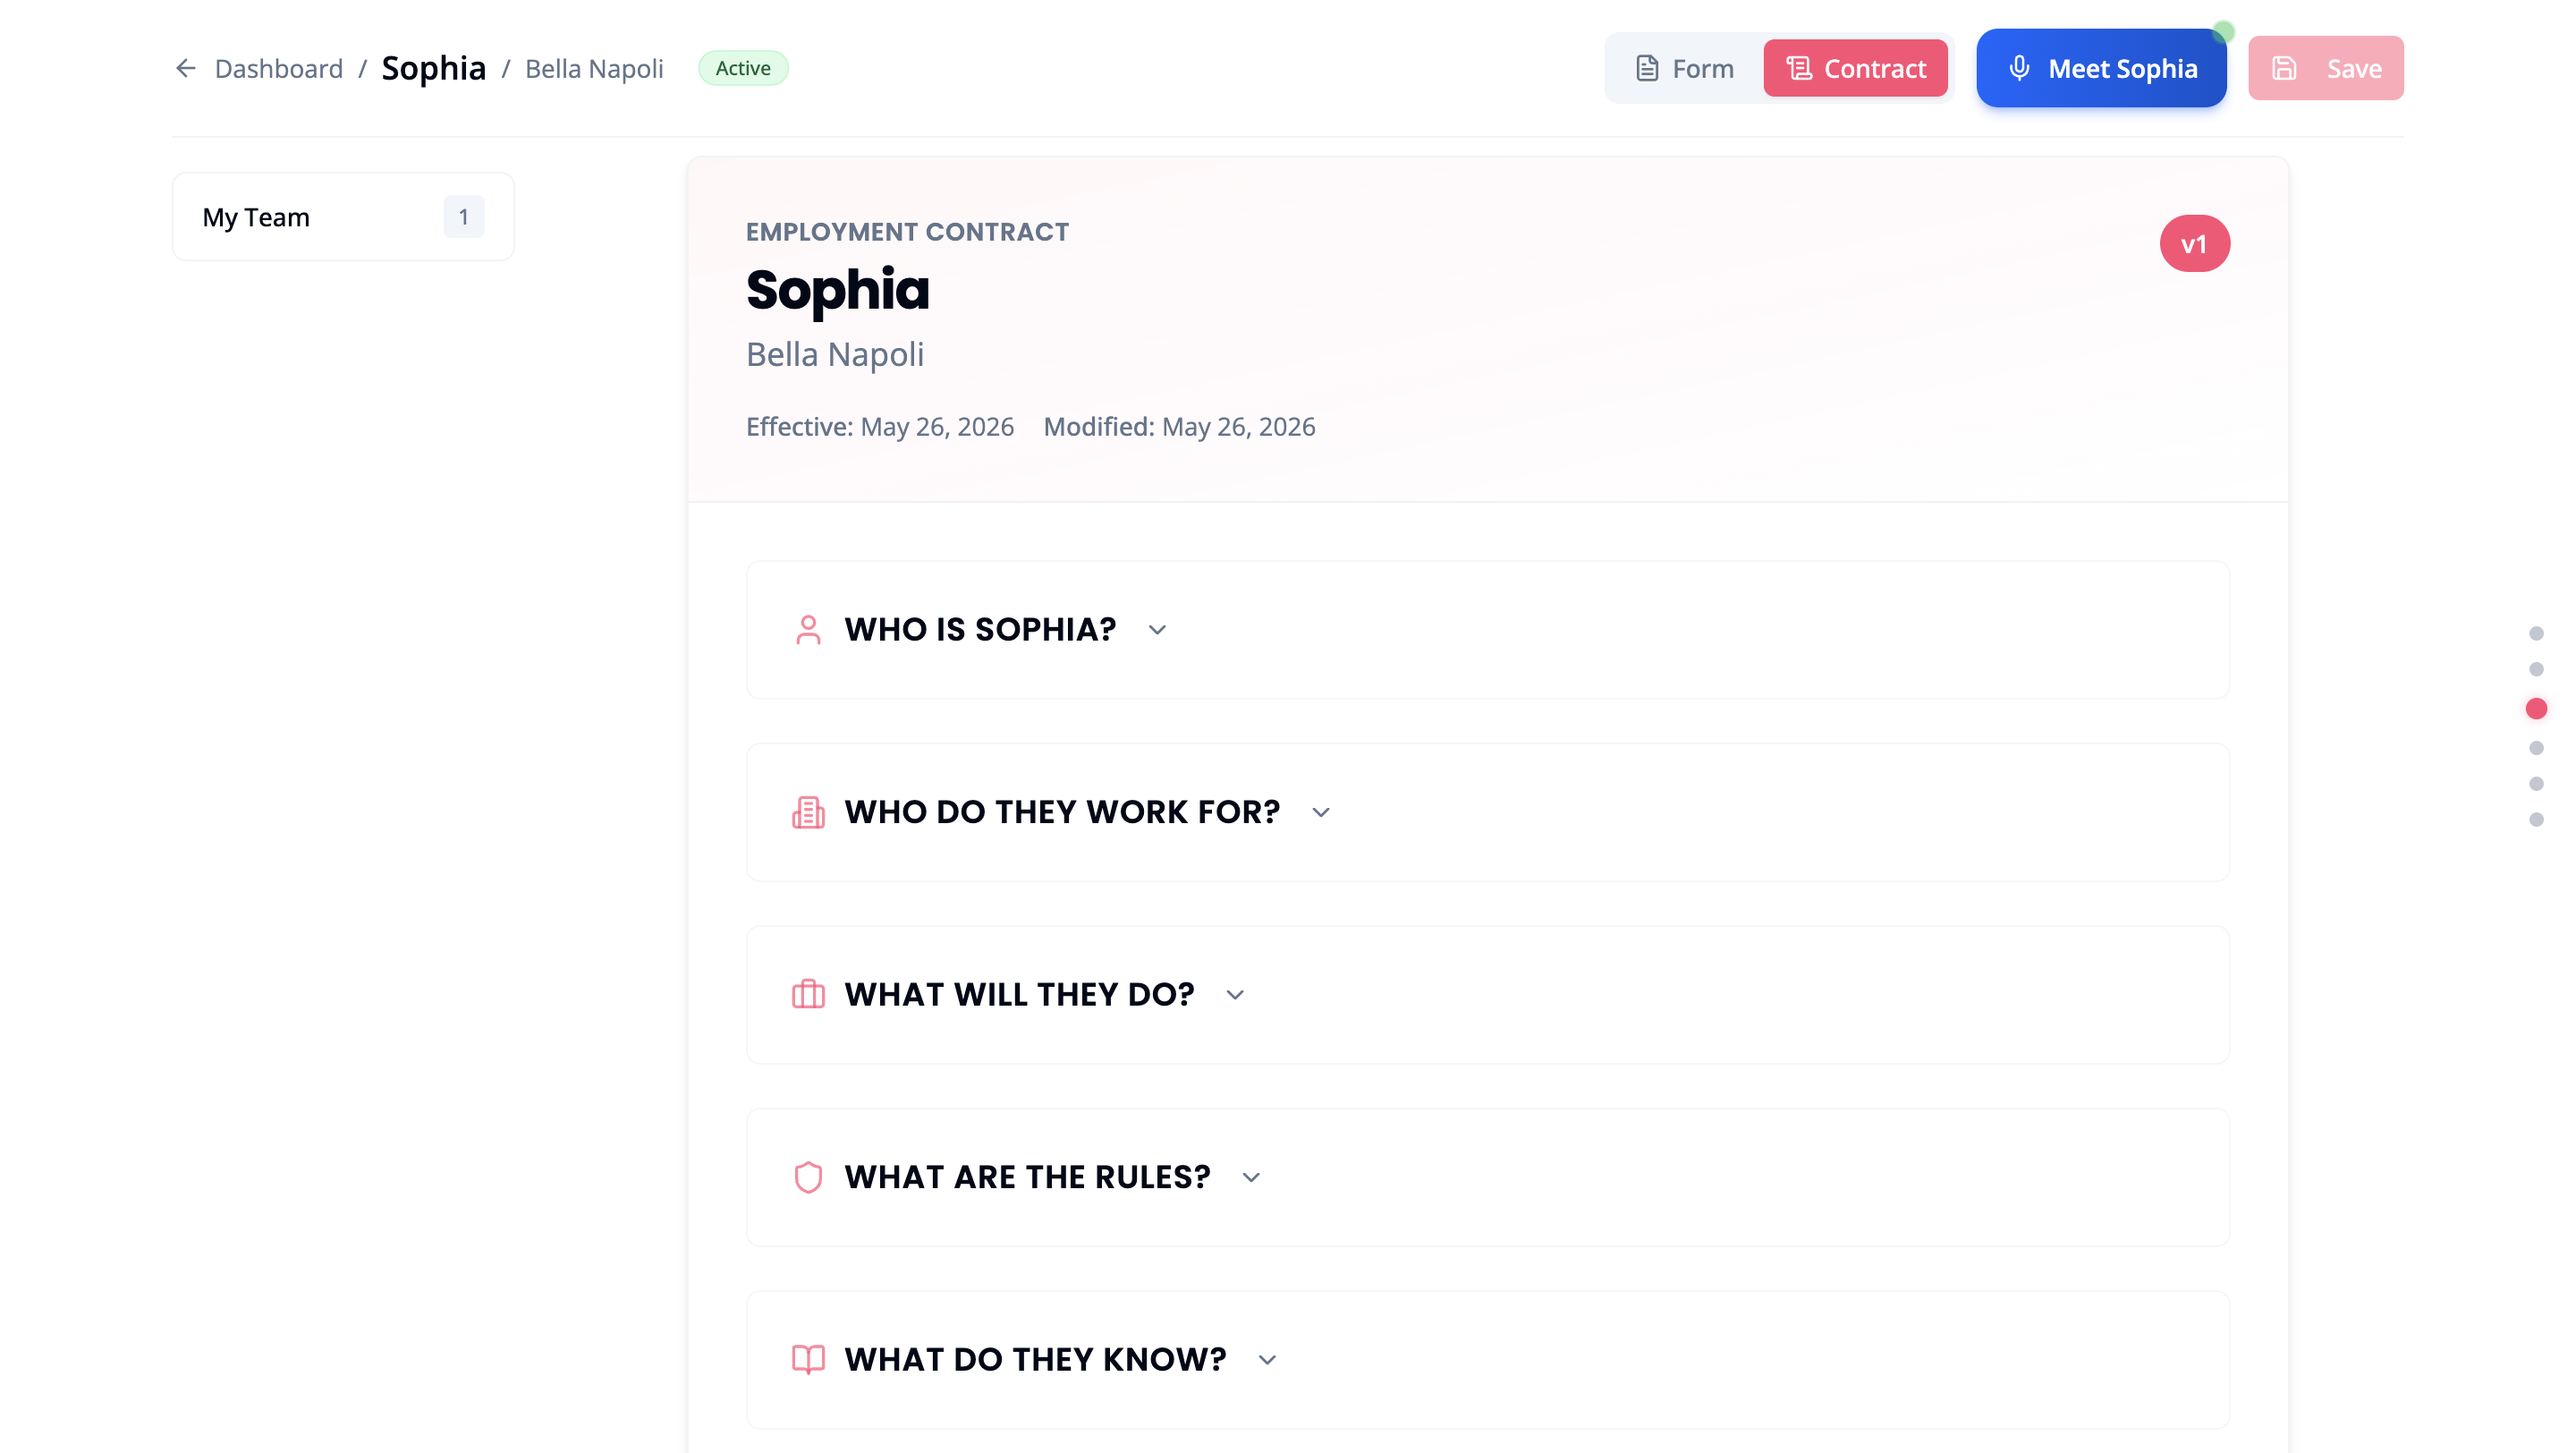
 To go live, click the Channels tab and connect a work channel:
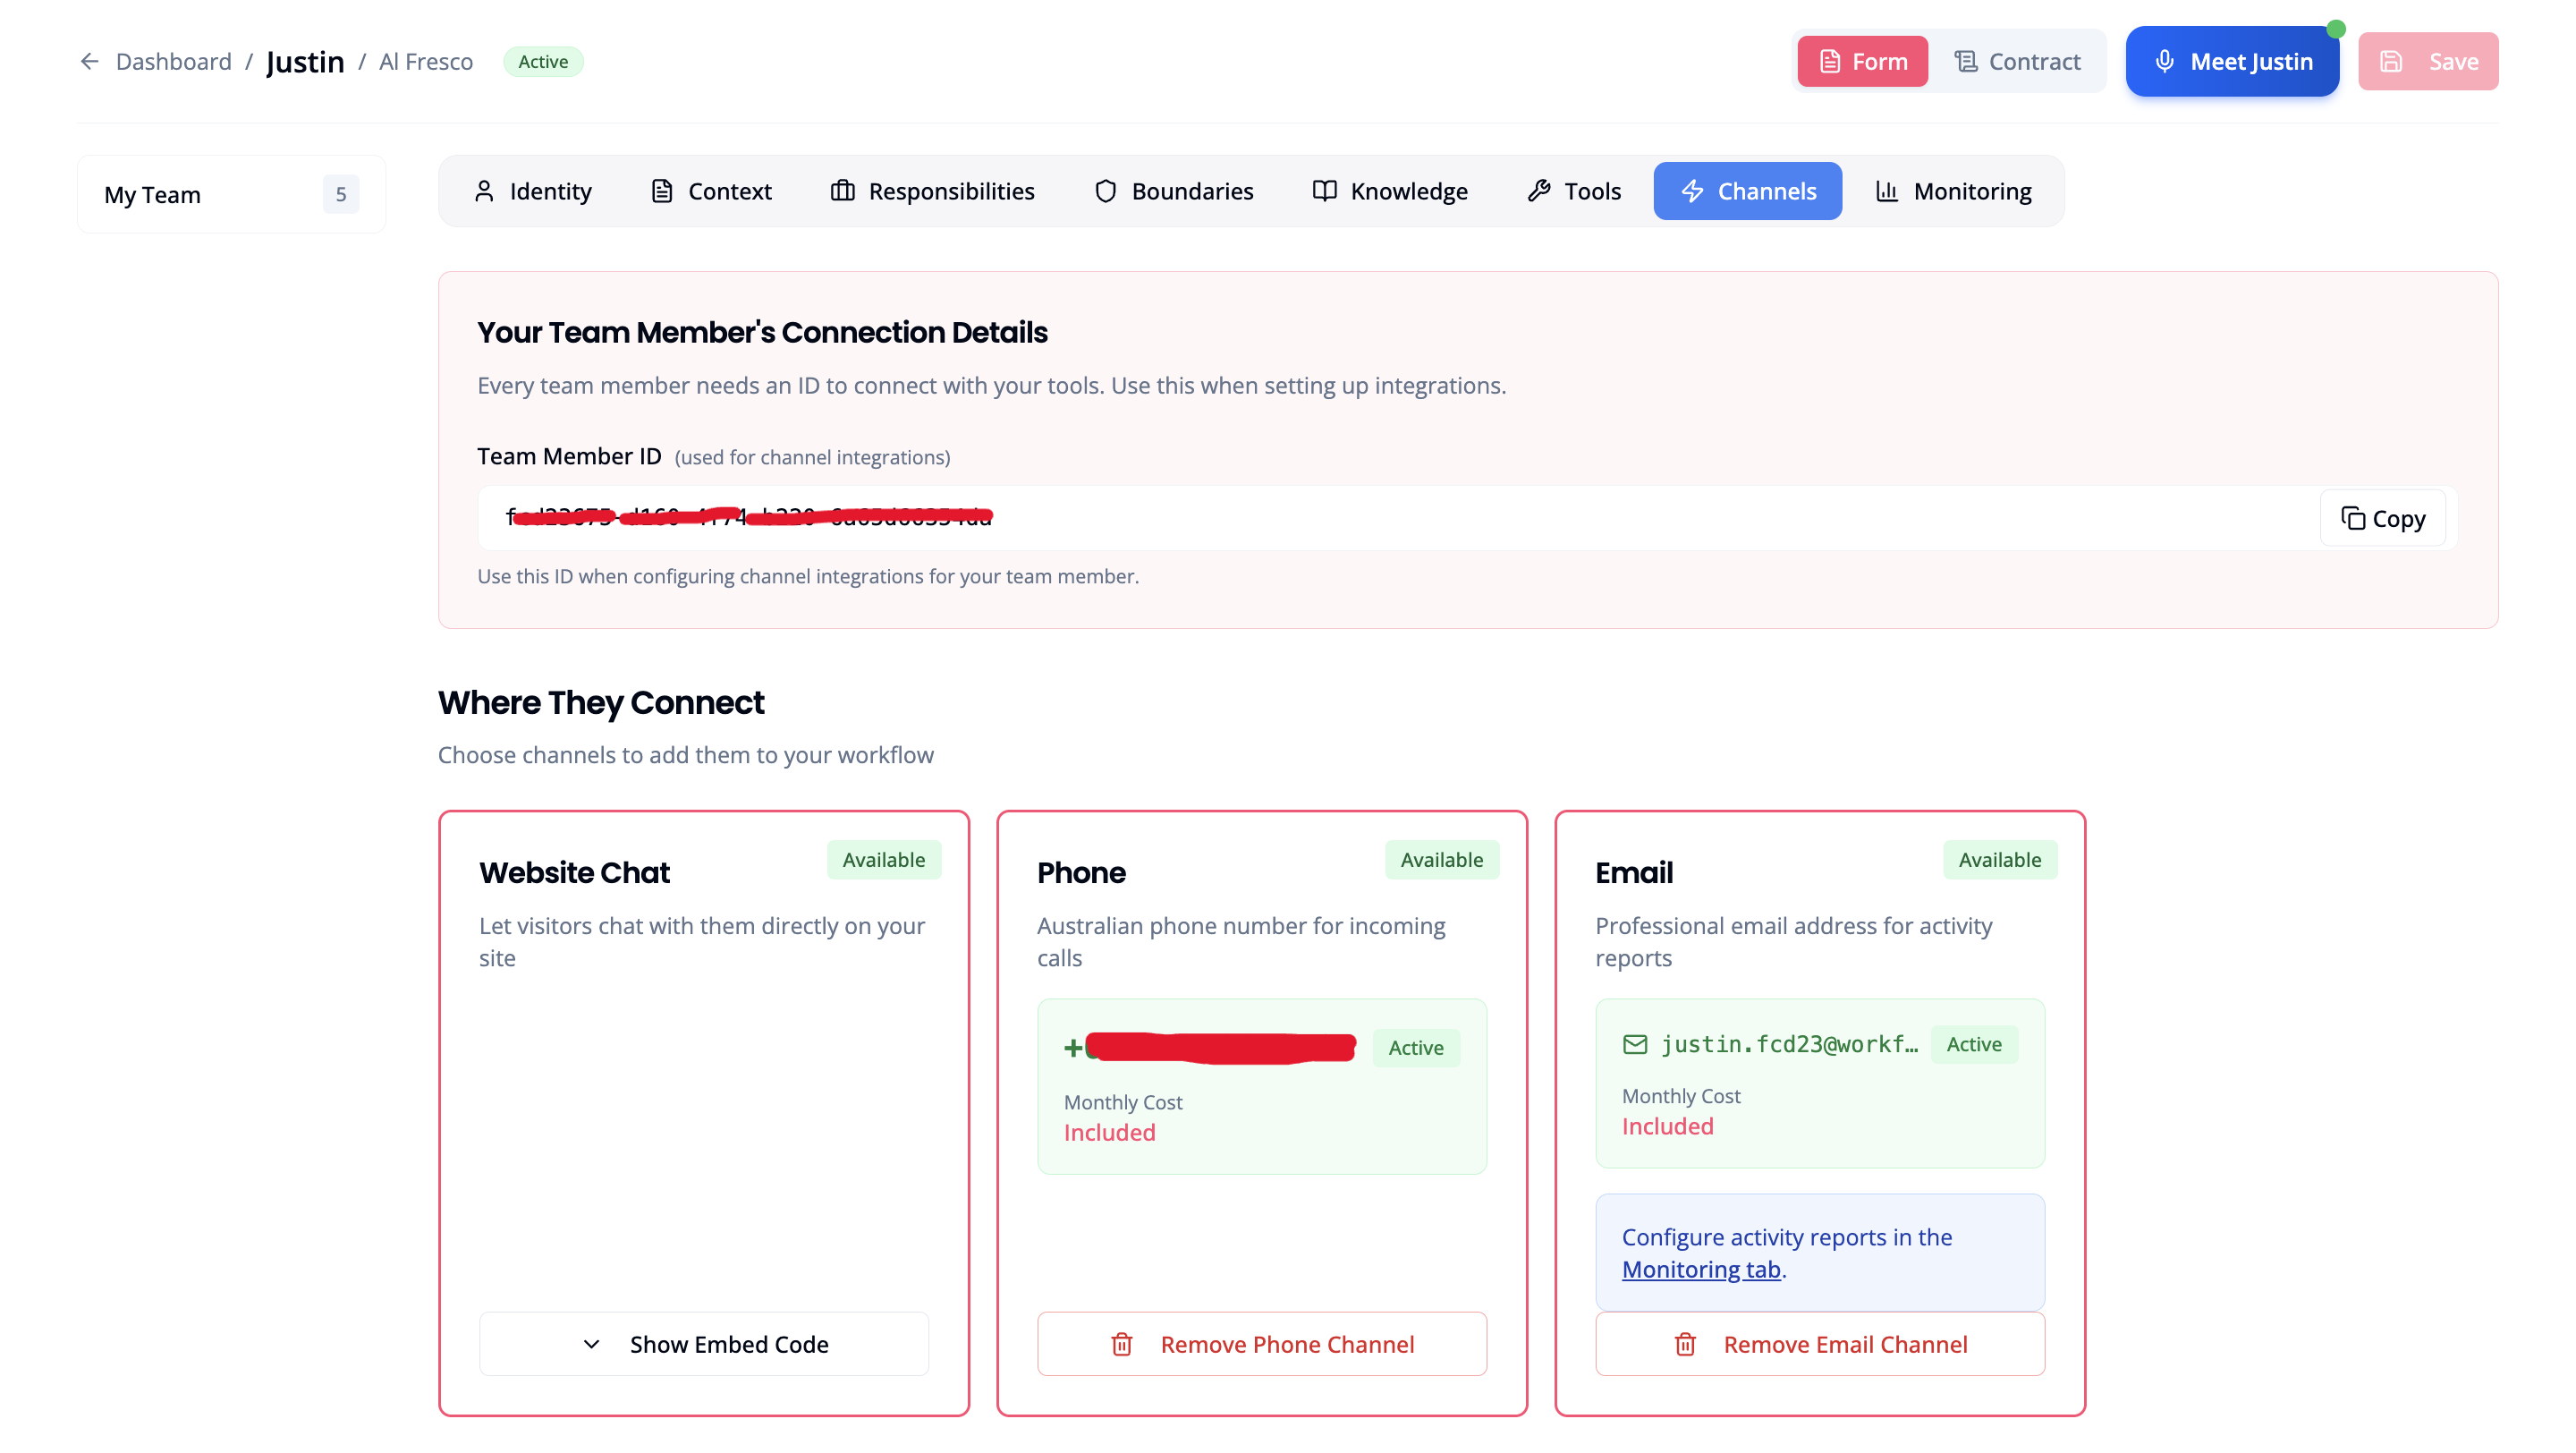 The moment a channel is connected, your worker is on shift.
Contract View
A formatted read of the Employment Contract. Expand any section to see the details, then click Edit to jump to the edit form.
Form View
The full editing interface, organised into tabs: Identity, Context, Responsibilities, Boundaries, Knowledge, Tools, Channels, Monitoring.
- Phone: click Add Phone Channel to provision a local number. Your worker answers every incoming call.
- Email: click Add Email Channel for a professional email address for activity reports.
- Website Chat: click Show Embed Code to embed a live chat widget on your site.
Make a Test Call
Call the number you just provisioned. Your Digital Worker answers immediately.Test with the questions your real customers ask most often. If anything sounds off (wrong tone, missing information, an awkward response), go to Form → Responsibilities or Form → Knowledge and make updates. Your worker will briefly reprocess and come back stronger.
Your Worker is Live. What’s Next?
Set Up Phone Support
Configure call handling, transfer rules, and voicemail for your Digital Worker’s phone channel
Onboard a Client
If you’re a Reseller, learn how to recruit Digital Workers on behalf of your managed clients
Understand the Lifecycle
A deeper look at how Digital Workers move through each status stage
Review Billing & Usage
See how minutes are consumed and how to read your usage report
Frequently Asked Questions
What if Tenma got something wrong in the interview?
What if Tenma got something wrong in the interview?
On the Review Interview Notes screen, click Edit next to any section before clicking Hire. If you’ve already hired, open the worker’s profile and switch to Form view. Each tab has editable fields. The worker will briefly reprocess with the updated details.
Can I recruit more than one Digital Worker?
Can I recruit more than one Digital Worker?
Yes. Each worker handles a distinct role. You might recruit one for inbound sales enquiries and another for appointment bookings. Each has their own Interview Notes, personality, and channels. All workers appear in your Your Team panel.
How do minutes work?
How do minutes work?
Your Digital Worker consumes minutes from your plan whenever they’re on an active call. Monitor usage in real time from the dashboard. If you run low, top up or upgrade your plan without interrupting your worker’s shift.
Why do I see 'your team members are paused'?
Why do I see 'your team members are paused'?
This banner appears when your account has a billing issue. Your worker’s status is still Active, but their channels are suspended.Common causes:
- Trial period expired
- Credit card payment failed
- Subscription cancelled
I'm a Managed Client. Can I follow this guide?
I'm a Managed Client. Can I follow this guide?
Yes. Your Reseller has already set up your account and allocated minutes to you. Log in with the credentials from your invitation email and follow the steps above. If you need more minutes or workers, contact your agency.